
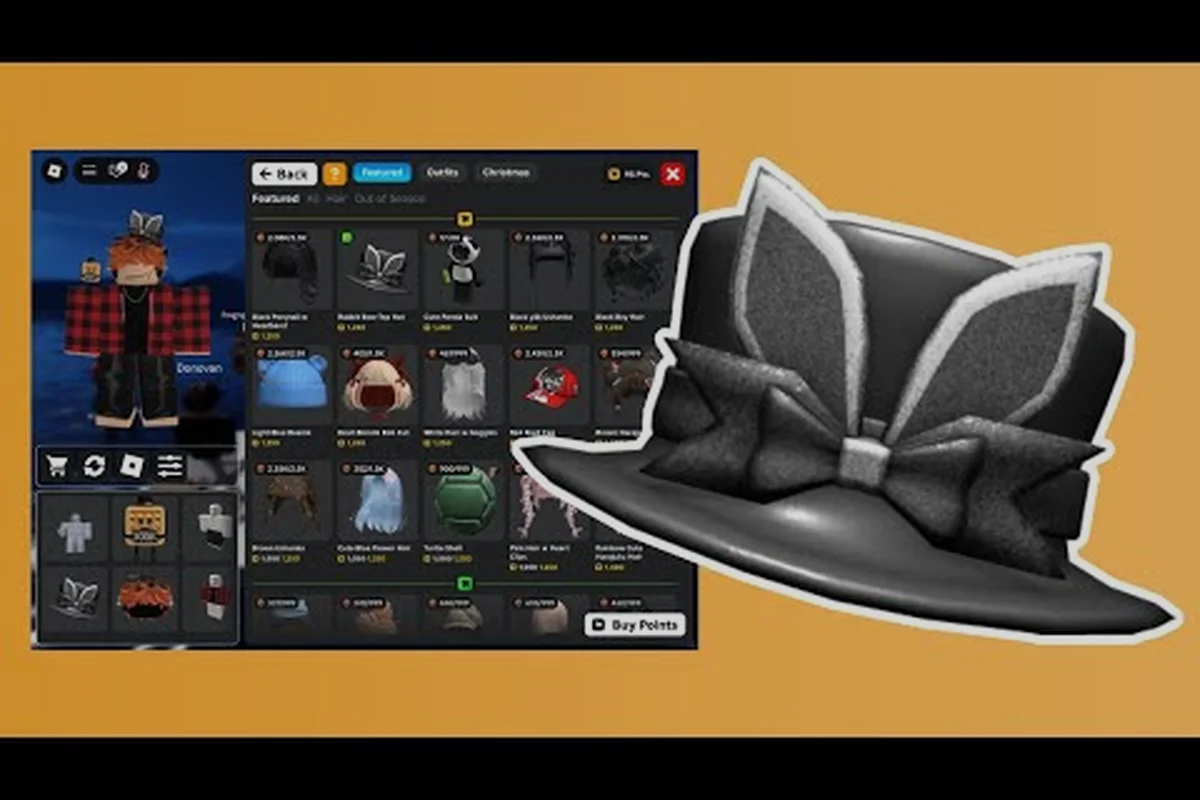
Shopping in My Avatar flips the usual Roblox catalog experience on its head because every purchase you make feeds a parallel Points economy that unlocks even more free accessories. This my avatar shopping guide breaks down the full loop from browsing community outfits to redeeming Points so you can build a wardrobe without wasting your balance. According to the official My Avatar game page, the experience has pulled in over 415 million visits and 5.2 million favorites since launching in April 2025, which means the shopping systems have been stress-tested by millions of players. Understanding how the preview, try-on, and Point Store layers interact is the fastest way to stop making regret purchases and start building outfits that actually hold up across every Roblox experience you join.
How the My Avatar Shopping Loop Actually Works
The core shopping loop in My Avatar is deceptively simple, but each layer has hidden mechanics that change how you should approach every purchase. When you enter the experience, you are dropped into a catalog browser that mirrors the full Roblox avatar marketplace, except everything you buy here also generates Points that feed back into a dedicated Point Store with over 100 free accessories. The loop runs like this: browse community-made outfits, preview individual items on your avatar, purchase what fits your style, earn Points from that purchase, then spend those Points on exclusive accessories that never touch your Robux balance. Because the economy is circular, every Robux you spend becomes a partial rebate in the form of Points, which is why experienced players treat shopping as an investment rather than a one-way expense.
| Shopping Stage | What Happens | Points Impact | Key Consideration |
|---|---|---|---|
| Browse Catalog | View full Roblox avatar marketplace inside My Avatar | None | Use filters to narrow by category and price |
| Preview Item | Try on any item before committing Robux | None | Check silhouette, color match, and layering |
| Purchase Item | Item saves to your Roblox inventory permanently | Earns Points | Points scale with purchase value |
| Spend Points | Redeem free accessories in Point Store | Deducts Points | Limited stock rotates regularly |
| Save Outfit | Store complete looks for quick re-equipping | None | Organize by theme or occasion |
The most important habit to build early is previewing everything before you buy. My Avatar gives you a full try-on system that shows exactly how a hat, hair, face, shirt, or pants will look on your current avatar before any Robux leaves your account. This is not a static thumbnail preview; you can rotate your character, check how accessories layer with existing items, and compare color palettes side by side. Players who skip this step often end up with mismatched pieces that look great in the catalog thumbnail but clash badly on their actual avatar. The preview workflow is the single biggest money-saver in the entire my avatar shopping guide, and it costs you nothing to use as often as you want.
Mastering the Preview and Try-On Workflow
The preview system in My Avatar is where smart shoppers separate themselves from impulse buyers, because it gives you a risk-free sandbox to test any combination before spending. When you click on any catalog item, the game immediately renders it on your avatar so you can evaluate fit, proportion, and color harmony in real time. This matters more than most players realize because Roblox catalog thumbnails are often shot in isolation with lighting and angles that flatter the item, while the actual in-game render can look noticeably different. The try-on workflow eliminates that gap entirely, and the best part is that you can stack multiple previews to test full outfit combinations without owning a single piece yet.
Building a Preview Routine That Prevents Regret Purchases
A disciplined preview routine turns the try-on system from a novelty into a genuine money-saving tool. Start by previewing the anchor piece of your outfit first, whether that is a hat, face, or shirt, because everything else will be judged against that foundation. Then layer on secondary items one at a time, checking how each new piece interacts with what is already on your avatar. Pay special attention to clipping issues, which happen when two accessories occupy overlapping space and create visual glitches that ruin an otherwise clean look. The preview system exposes these problems instantly, while buying first and checking later leaves you stuck with items you will never equip again.
| Preview Check | What to Look For | Red Flag | Fix |
|---|---|---|---|
| Silhouette | Overall shape reads clearly at a glance | Accessories blur together into a blob | Swap one bulky piece for a slimmer option |
| Color Harmony | Palette feels cohesive across all pieces | One item clashes with the rest | Preview alternative colorways |
| Layering Order | Items stack naturally without clipping | Hat floats above hair or clips through face | Adjust accessory combination |
| Proportion | Head, torso, and leg items balance visually | Oversized hat dwarfs the face | Scale down or choose smaller accessory |
| Theme Consistency | All pieces tell the same visual story | Mixing gothic and pastel elements randomly | Commit to one aesthetic direction |
The preview workflow also connects directly to your broader customization strategy. If you are still learning how the catalog is organized and which item categories matter most, the My Avatar catalog guide walks through the full item hierarchy and pricing structure. Combining that knowledge with disciplined previewing means you will rarely buy something that does not fit your existing wardrobe, because you will already know which slots have the highest visual impact and which items are worth prioritizing before you even open the try-on system.
Earning Points Through Every Purchase
The Points economy is what makes My Avatar feel more like a loyalty program than a standard shopping experience, and understanding how it works changes the way you value every Robux you spend. Every purchase you make in the catalog generates Points that accumulate in your balance, and those Points can be redeemed in the Point Store for accessories that are exclusive to My Avatar. This means your Robux spending has a compounding effect: you get the item you wanted plus a rebate in Points that eventually unlocks free gear. The exact Points-per-Robux ratio can shift based on promotions and updates, so checking your balance after each purchase is the best way to track how much you are actually earning.
How the Point Store Turns Shopping into Free Accessories
The Point Store is the destination for everything you earn through shopping, and it operates on a rotating stock model that rewards players who check back regularly. With over 100 free accessories available at any given time, the store covers faces, hats, hairs, shirts, pants, and special themed items that only appear during limited windows. Because the stock rotates, an accessory that is available today might disappear next week, which creates a natural incentive to spend your Points strategically rather than hoarding them indefinitely. The My Avatar ultimate guide covers the Point Store mechanics in deeper detail, including how to time your redemptions around stock rotations and limited drops.
| Point Store Category | Typical Point Cost | Availability Pattern | Best Time to Buy |
|---|---|---|---|
| Faces | 50-1299 Points | Rotates weekly | When a face matches your core aesthetic |
| Hats | 100-800 Points | Rotates every few days | During themed events |
| Hairs | 75-600 Points | Rotates weekly | When a unique colorway appears |
| Shirts and Pants | 50-400 Points | Rotates frequently | When building a complete outfit |
| Limited Event Items | 200-1500 Points | Seasonal windows only | Immediately when available |
The key insight here is that Points are not just a bonus; they are a second currency that lets you expand your wardrobe without spending additional Robux. Players who treat every catalog purchase as a Points-earning opportunity build up substantial balances over time, which then translates into free accessories that would otherwise cost real money. The my avatar shopping guide approach is to always check your Points balance before making a Robux purchase, because you might already have enough Points to grab a free alternative that fits your outfit just as well.
Redeeming Codes for Bonus Points
Codes are the fastest way to inject free Points into your balance without spending a single Robux, and they are released through the official My Avatar Discord and community channels on a regular basis. The redemption flow is straightforward: open the Point Shop, navigate to the Buy Points section, and paste your code into the Enter Code Here box. Codes like 50Points grant 50 free Points instantly, while older codes such as 100POINTS may expire without warning, so redeeming them as soon as they drop is always the right move. According to Game Rant's September 2026 code tracker, the official Discord remains the primary channel where new codes are announced, which means joining that community is essential if you want to catch every free Points opportunity.
| Code Type | Typical Value | Expiry Risk | Source Channel |
|---|---|---|---|
| Standard Codes | 50-100 Points | Medium, expires without notice | Official Discord |
| Event Codes | 100-500 Points | High, tied to limited windows | Developer announcements |
| Milestone Codes | 200-1000 Points | Low, released for visit milestones | Social media and Discord |
| Partner Codes | 50-200 Points | Medium, tied to collaborations | Cross-promotional posts |
The code redemption habit pairs perfectly with the shopping loop because every free Points injection reduces the amount of Robux you need to spend on accessories. If you are new to the game and still figuring out how to change your avatar and manage your inventory, the My Avatar beginner guide covers the foundational mechanics that make code redemption and Point spending feel natural. Building a routine where you check for new codes before every shopping session ensures you never leave free Points on the table.
Building a Complete Customization Workflow
The ultimate goal of this my avatar shopping guide is to help you build a customization workflow that feels effortless, because the players who thrive in My Avatar are the ones who treat outfit creation as a repeatable system rather than a series of one-off decisions. A complete workflow starts with defining your aesthetic direction, moves through catalog browsing and previewing, incorporates Points earning and code redemption, and ends with saving organized outfits that you can re-equip instantly. The more you systematize this process, the less time you spend hunting for pieces and the more time you spend enjoying the looks you have built.
Defining Your Aesthetic Before You Browse
The biggest mistake new players make is browsing the catalog without a clear idea of what they are trying to build, which leads to impulse purchases that do not fit any coherent style. Before you open the catalog, spend a few minutes defining your aesthetic direction: are you going for cute and pastel, gothic and dark, neon and cyber, or something entirely custom? Write down three to five keywords that describe your target look, then use those keywords as filters when browsing. This simple step eliminates the majority of regret purchases because every item you preview gets judged against a defined standard instead of a vague feeling.
Organizing Saved Outfits for Quick Access
Once you have built a few outfits you love, the saving system becomes your best friend. My Avatar lets you save complete looks so you can switch between them instantly without re-equipping individual pieces, which is essential if you like to rotate between different aesthetics depending on your mood or the experience you are joining. Organize your saved outfits by theme, occasion, or color palette, and give each one a descriptive name that helps you remember what it contains. The more organized your saved outfits are, the more value you get from every piece you own because you will actually use them instead of forgetting they exist.
| Workflow Stage | Key Action | Time Investment | Value Delivered |
|---|---|---|---|
| Aesthetic Definition | Write 3-5 style keywords | 5 minutes | Filters out 80% of irrelevant items |
| Catalog Browsing | Use filters and search | 10-20 minutes | Surfaces items that match your direction |
| Preview and Try-On | Test combinations risk-free | 5-15 minutes | Prevents regret purchases |
| Points and Codes | Check balance and redeem codes | 5 minutes | Adds free currency to your balance |
| Purchase and Save | Buy confirmed items, save outfit | 5 minutes | Locks in your new look permanently |
This workflow becomes second nature after a few sessions, and the compounding benefits are significant. Players who follow a structured approach consistently report spending less Robux while building more cohesive wardrobes, because the preview system catches mistakes before they happen and the Points economy rewards every purchase with future free accessories. The my avatar shopping guide philosophy is simple: shop with intention, preview everything, and let the Points system work in your favor.
Frequently Asked Questions
How do I earn Points in My Avatar without spending Robux?
You can earn free Points by redeeming codes through the Point Shop Buy Points section, participating in limited events, and claiming milestone rewards announced on the official Discord. Codes like 50Points grant 50 Points instantly, while event codes can award 100 to 500 Points during seasonal windows. Checking the Discord before every session ensures you never miss a free drop.
What is the best way to preview items before buying them?
Open any catalog item and the game automatically renders it on your avatar, letting you rotate, layer, and evaluate the piece in real time. Stack multiple previews to test full outfit combinations before spending a single Robux. This try-on workflow exposes clipping issues, color clashes, and proportion problems that catalog thumbnails often hide.
Can I use Points to buy items from the regular Roblox catalog?
No, Points can only be spent in the My Avatar Point Store, which contains over 100 exclusive free accessories including faces, hats, hairs, shirts, and pants. The Point Store stock rotates regularly, so an item available today might disappear next week. Your Robux purchases from the regular catalog generate Points, but the two currencies remain separate.
How often do new My Avatar codes get released?
New codes are released on an irregular schedule tied to updates, milestones, and events, with the official Discord serving as the primary announcement channel. According to Game Rant's code tracker, codes like 50Points remain active for varying windows, while older codes such as 100POINTS can expire without warning. Redeeming codes immediately after they drop is the safest strategy.
What should I buy first with my Points?
Prioritize faces and hats first because they occupy the highest-visibility slots and have the biggest impact on your avatar's overall look. Faces in the Point Store range from 50 to 1299 Points, while hats typically cost 100 to 800 Points. Building a strong face-first foundation makes every subsequent outfit look more polished, even if the rest of your wardrobe is budget-friendly.